First things first: Thank you faithful commenters LonettA, Annemarie, Sigrid, and Holly! Your comments really encourage me! I appreciate you taking the time to do so. Thank you also to those 3 people that clicked the heart icon as well.
I do this first because I know that when I comment on others blogs, I don’t usually go back and see if they responded, so I figured people that comment on mine probably don’t either but I really want them to know that their efforts mean a LOT!!!
Now on to this week’s post:
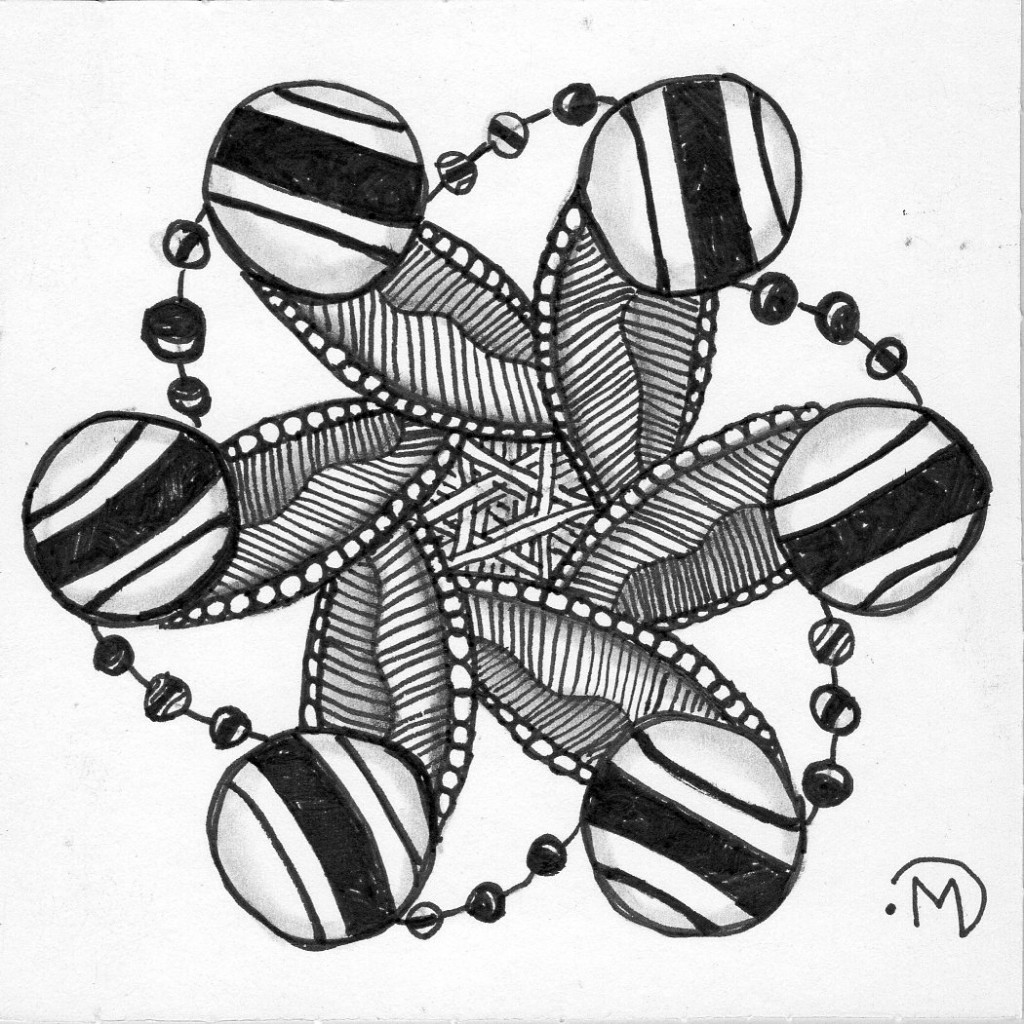
I have wanted to do a zendala for years! I have visited the Diva’s guest blogger, Erin Olson’s blog, The Bright Owl, for years now and loved what she shares there but have never been courageous enough to jump in and give it a try. But since the Diva Challenge this week is to use the provided zendala string, I finally did it!
 So, the deal is that Erin provides the template or string in a pdf to download and print. I was intimidated by the process of transferring the string to my tile but pushed on today and it wasn’t as bad as I thought it would be.
First I printed off only the page with the tile size template on it. Then I cut out the square and turned it over. I used my 6B pencil and scribbled all over the back, holding it up to the light every once in a while to ensure that it was blackened behind all the lines.
Then I took a tile and taped the template to the front. Next I used a ball point pen and traced all the lines. When I finished I removed the template (and saved it for later because I think I can reuse this template again with all the pencil I have still on the back). I was shocked to see how dark the string lines were on my tile. So much so that I did take my kneaded eraser and dabbed at the string a bit to lighten the lines.
I had a couple of tangles that I considered for the circles on the outer edges of the string but settled on Jetties because the Weekly Zentangle Tangle Video Facebook group needed some more tiles using Jetties. I also used Meer and attempted a bit of auraknot in the middle but I probably should have stuck with my first thought and used paradox there. I then added some black pearls and a few little jetties on the strings between the big jetties. I’m quite pleased with how this one turned out.
Until next time, God bless,
Michele ºÜº

This zendala is very fun. I like its contrasts and its naturalness.
I do hope this is just the first and not the last zendala. It’s really lovely!!! Thank you for mentioning the names of tanglers who comment on your blog, that is very friendly of you!!!
I think you combined patterns well, using blocked in areas to contrast with the lighter patterns. I think it’s well thought out and you did a good job here.
beautiful zendala
Lovely!
Through your choice of tangle and execution, you ended up with a compelling zendala that feels layered. (I also used the technique you described to transfer the pattern onto my mandala tile and felt that I learned something. I used a 4B pencil and the lines came out at the right intensity).
Beautiful job – I especially like the beadlines between the outer circles.
That is a wonderful, happy, festive zendala. Terrific job on your first!
I like to make my zendalas bigger, and hate to transfer them, so this is how I do mine. I take the template directly from The Bright Owl’s blogpost, transfer it to Word (I copy it to my desktop, then move it to Word) so I can change the size to anything I want. Then I take the transparency down to about 85%, so it’s barely visible on the page. Then I print it directly onto the paper. Works great for me and is so much easier than copying it by hand.
Lovely and very playful zendala! Fine choice of tangles!
Fantastic job! You’re well ahead of the game of doing great Zendalas looking at this great one. Nice work!! Sarah
This looks like some sort of wonderful beaded ornament. I love it! I was hesitant to do my first Zendala, too. I don’t do them often, but have found that once you decide which tangles to use and put them in the first sections, the rest is pure relaxation. I know this won’t be your last!